
This post may contain affiliate links, meaning, at no additional cost to you, I may earn a commission if you click through and make a purchase
Last summer, I finally got the keys to our new house. Yay! But before we could move in, something had to be done about the floors. There are wood floors in every room. I love this about the house! Unfortunately, only the kitchen and bathrooms had floors that had been replaced or refinished. The rest were in pretty sad shape. In the bedrooms, the wood had been painted over at least three times. To revive the old floors, I chose peel and stick vinyl plank flooring.
Vinyl plank flooring has become very popular lately, but most of it is not “peel and stick”. When you see it in the stores or online it’s usually a “floating” type. The “floating” vinyl planks hook together and lay on top of a floor. They are not very flexible and are harder to cut into the odd shapes old houses often require. They do come in a wider variety of colors and are more durable. Pros and cons of each kind that are very dependent upon your house situation. Make sure you get the kind you want and will work best for your house.
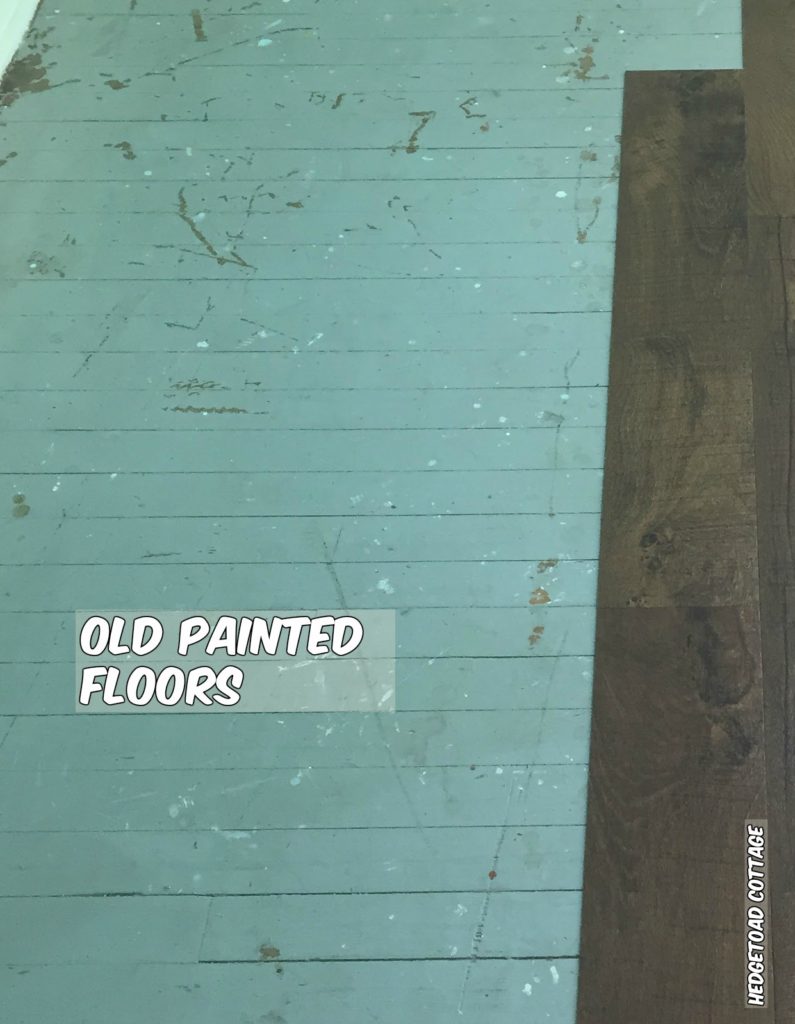
You can see how bad the paint is. It’s worn and chipping. There are also a lot of paint splotches in some areas – like Jackson Pollack went crazy one night. In some places, the paint is more than three layers thick! Also, the floors aren’t level. There is a weird hump in one bedroom. This is to be expected in an old house. The cost and labor required to fully level, sand and refinish the floors were out of my price range at that time. After doing a lot of research, I decided on using Peel and Stick Vinyl Planks. They’re very flexible and able to bend over slightly uneven floors. They’re quick and easy to install. Plus waterproof; so when your kids take their drinks to their rooms and spill them, it’s not hard for them to clean up.
Tools Needed:
This post contains affiliate links. This means that by clicking on the link and purchasing an item, I may receive compensation at NO additional cost to you. Thank you for your support.
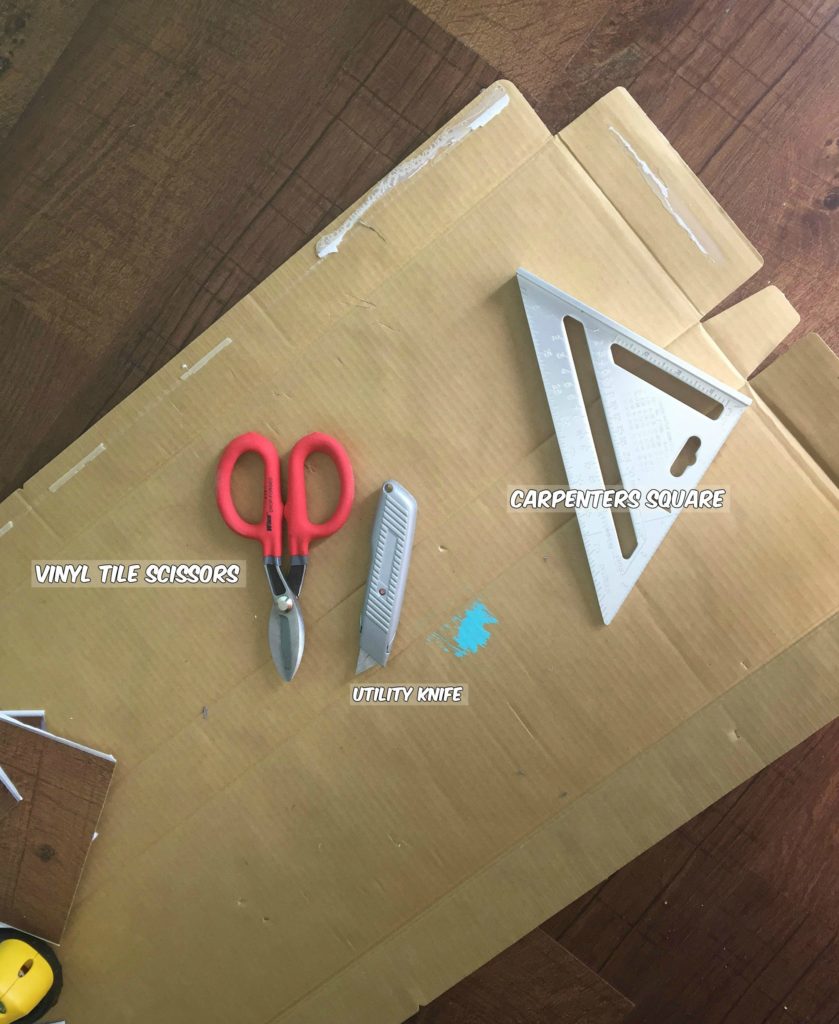
To install peel and stick vinyl flooring, you don’t need much. The only thing that is an absolute must, is the Utility Knife to cut the planks to length or width needed. Now, if you aren’t an expert cutter, I highly recommend getting a Carpenter’s Square
to help with those straight cuts. A pair of vinyl tile scissors makes cutting rounded edges a bit easier – I found them at Home Depot one day, but haven’t seen them since. (**Update 2025: I’ve upgraded to a vinyl tile cutter. It makes cutting much more easier and uniformly straight. I recommend purchasing for any type of vinyl flooring that you are going to install) I also opened one of the boxes that held the planks and flattened it to use as a cutting surface for trimming planks to the needed size.
Floor Preparation
Peel and stick vinyl tiles are easy to install on most types of floors. It’s not recommended to go over the carpet – and, really, if you were thinking about doing that, you should stop any DIY projects now. It’s also not recommended to be placed directly on concrete. It will cause big moisture problems and pop up very quickly. Make the floor as smooth and flat as you can get it before laying any vinyl planks down. If you can sand down the floors without causing more destruction or spending a few thousand on a fancy sander, do it. If you can’t, do the best you can. This product is forgiving on levelness. The area should be free of dust or any other particulate. Use a shop vac on all surfaces.
First Steps
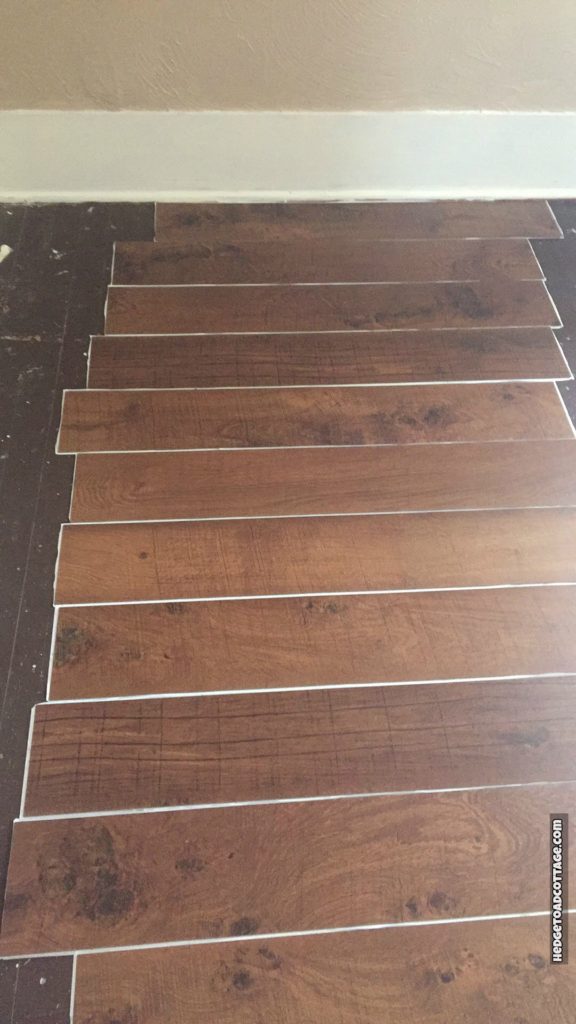
Once you’ve chosen your color of planks and purchased them, you will need to acclimate them to your house for a day or two. This is definitely a rule for wood and laminate, but it’s a good idea with vinyl too. Once that’s done, open the box and layout some planks without removing the backing. No peeling or sticking yet! Do this to get a look at what your floor will look like and check the size of the planks vs. the width of your room.
As you lay them across the floor, horizontally and vertically, you should not need a wall edge plank that is less than 3″ wide. If you end a plank less than 3″ from a wall, you will need to trim the plank on the opposite wall to prevent this. These tiny or thin planks will not stick well to the floor. No one wants to have holes in their floor where a vinyl plank has popped up and gotten lost. 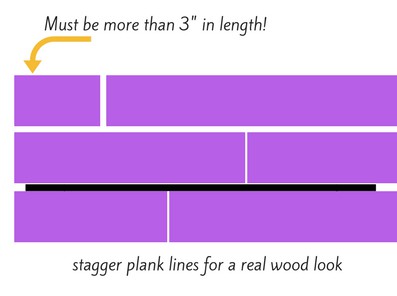
Next Steps
In an old house, you are pretty much guaranteed that your walls will not be square. This means that they do not form a perfectly square box. If you attempt to line up your first row of planks (or tiles) along the wall, it will more than likely be at an angle and will cause all your row lines to be crooked. It will look weird and it will probably drive you nuts after a few weeks. Spare yourself this pain and lay down a straight line near the middle of the room – either Chalk Line Level or Laser Line Level
– and lay your first row of planks.
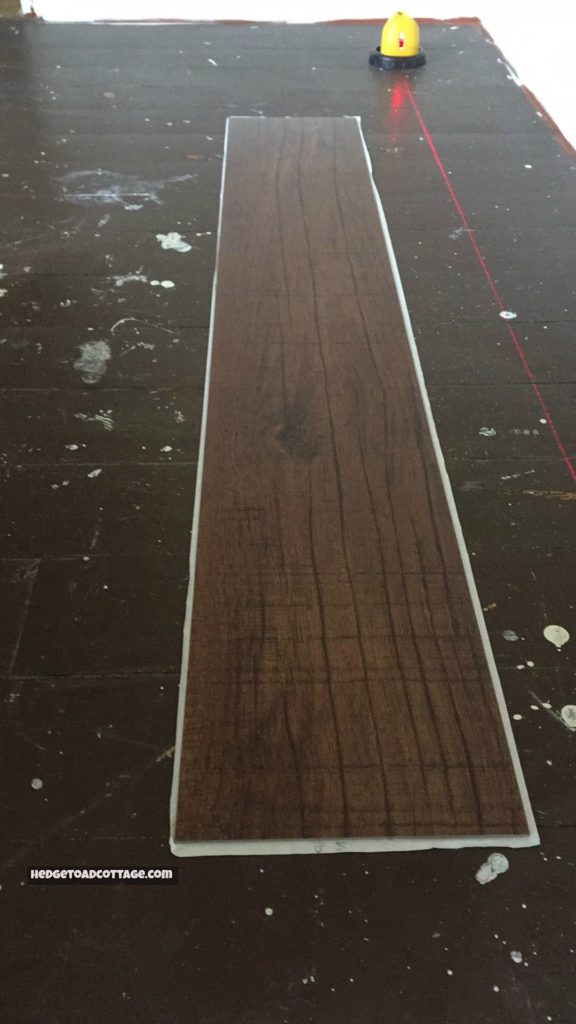
Lay the subsequent rows next to this first plank and move outward towards walls. Secure tiles to floor using a vinyl tile Roller or, if you’re on a diet “break” like me, stamp heavily on each plank. After a nearly a year, there hasn’t been any shifting or lose planks.
As you start each new row, cut planks to various lengths. You don’t want your plank lines to match up next to each other. Stagger the lengths for a better wood type look. Cutting the planks is pretty easy. Use the utility knife and carpenter’s square to score a straight line across the plank. Then bend the plank along the line, until it “snaps”. It should “snap” pretty easy. Using a vinyl tile cutter makes it quick and easy! When I upgraded to this tool, I wished I’d done it sooner! This is the same process for vertical or horizontal cuts.
Pro Tip: Line up your rows with the longest wall in the room. This will give you a really nice look to the room.


Great tutorial! I have used these same floors in houses I have flipped, they are durable, water-resistant, super easy to install; and I, personally, like the look much more than laminate flooring.
I agree! They aren’t “clacky” like laminate.
What is the name and manufacturer of the vinyl floor that you installed. I’m having a hard time finding something that look somewhat rustic without it being Grey.